

Pages

Friday, July 29, 2011

At long last.....

I am so pleased to have something to show you. This was the Tug O' War bargello stitched earlier this year and designed by the late Jean Hilton. I wanted to do something with it other than hang it on the wall, and several readers suggested I make it into a serving tray. Wonderful solution! After trying unsuccessfully for several weeks to find a ready made tray that would be suitable in color and size, I eventually took it to a local framer and had a custom tray made. This was also suggested by a reader.
The most challenging thing about the whole process was finding the handles. Having no luck here in the Denver area locating this type of hardware, I turned to the Internet and in the end needed to send away to this company located in WY that had an extensive selection of beautiful hardware for various needs. I was very pleased with the level of service and quality of the products which were made in England.

The framing included using plate glass to prevent accidental breakage and then being sealed in silicone to avoid damage from any leakage should the tray actually be used. Because of the smallish size, my intent for the tray was for decorative purposes only but now it can be safely used.

Another project I am very proud of has been framed and already sitting in place on the sofa table at my daughter's home. Deco Cat was stitched and intended to be made into a large decorative pillow at first. I had purchased all the fabric and trim and set out to turn it into a whimsical creation. After cutting everything out I began sewing and soon realized that this was not going to work out the way I wanted it to. The problem is that the cat design is so large and in order to accommodate two or three mitred fabric borders and fabric covered cord, the pillow would have had to be HUGE to balance with the stitched design. I was so disappointed but managed to take it apart without damaging the canvas and skulked down-trodden to the framers. The framer transformed deco cat into a wonderful work of art (This piece was a Mystery Class by Ruth Schmuff and I wanted it framed like hers!)

Oh, I almost forgot, meet Tahoe the inspiration for my version of deco cat, enjoying a relaxing afternoon with my daughter reading magazines and sharing the sofa.

Thank you for visiting the blog today, I've missed posting and look forward to resuming normalcy as life has been anything but normal lately. I have several new projects to share with you including getting started on a canvas from my Mindy's Needlepoint Factory visit.

Tuesday, June 7, 2011

Santa is Stitch Finished

Last writing I said in so many words that I was nearly finished with White Santa, that I was going to get to gettin' with the tedious turkey tufting and then on to the background, rounding out with a few other minor finishing details and I'll be done. Well all that happened it just took weeks instead of days. One might begin to think I'm slowing down or something. No, I'm not. It was just wishful thinking that I could get this done sooner than later. Yes, that's what it was.

I very much enjoyed working on White Santa especially with all the various stitches involved providing a number of learning opportunities, I enjoyed them all.....well almost all. The turkey work pretty much bogged down the project for me. I do find it a bit tedious but hold out hope that it's just me and the way I execute the stitch. I take 4 passes with the needle and a lot of holding everything out of the way. Using 3 strands of Medici doubled over I was thankful there wasn't that much of it on this piece. If you have any tips or suggestions to make this stitch a little easier or work up more quickly, I'd love to here from you.  Maybe you blog and have addressed turkey work and would like to leave a reference or just want to share how you handle this stitch. Thank you in advance for any advice.

In contrast, one of the stitches I enjoyed and surprised myself with was the double bullion used on the mustache. The stitch guide provided excellent instructions making it very easy to do. At first apprehensive whether I was up to the task, after a few practice stitches I got the hang of it and am still amazed that it turned out as nicely as it did. I wanted to demonstrate this technique but needed a third hand to hold my camera so I will attempt to explain the process in my own words and hopefully you can visualize this.

First, using 2 strands doubled over and knotted, secure the thread away and come up through the canvas pulling through the length of the thread until it stops. Hold the needle between your right pointer and thumb and begin twisting clockwise until the strands have a very tight twist. Grab the twisted thread at the center point of the length of thread with your left hand and then with your right hand plunge the needle down through the canvas one thread over stopping just short of the needle going all the way through and keeping hold of the thread in your left hand and the needle in the right. With the twisted strands still in the left hand begin to twist them counter-clockwise until the threads are tight. Now gently begin to pull the the needle all the way through to the back of the canvas and as you continue pulling the bullion begins to form on top of the canvas. Once you've pulled the thread all the way through, bring your needle back up through the canvas where you want to secure the loose end of the bullion and secure it catching a thread on the underside of the formed bullion. In my case, as instructed I made my bullion curve to form one side of the mustache and then repeated the process on the other side. I was impressed as to how easy this was.  I am really proud that I was able to satisfactorily execute the mustachio thanks to the explicit, step by step instructions provided within the stitch guide.

Another interesting technique was used on the bag. The stitch is reverse basketweave but to me it looked more like a T stitch. Either way it creates the textural effect of a burlap bag and is perfect in this application. I also want to mention the pant legs which were stitched with rows of basketweave and French knots on one leg and turned one quarter turn on the other, again creating a great textural effect.

All in all the stitch guide, created by Susan Portra, made stitching this canvas as fun as it looks. Providing new challenges balanced by bursts of the familiar kept my interest peaked throughout the project. This, probably more than anything can motivate me to continue and finish my projects. Even though White Santa took longer than I expected I thoroughly enjoyed it. It will be finished, not as a stand up as first thought as the background is too "open" and IMHO needs more support, but instead as a 3-d rectangular block decorated to look like the front of a Christmas package. As always thank you for stopping by to visit today and I hope you'll come back soon!

Monday, May 9, 2011

Mindy's Needlepoint Factory

Like many needleart "enthusiasts" whenever travelling I check online for new-to-me stash enhancement opportunities. This time was no exception and did I ever get lucky visiting Mindy's Needlepoint Factory. Have you ever been??? OMG I didn't want to leave... ever.  But not to worry, I took a large part of the shop contents home with me thanks to my enabling husband and daughter....like I needed any encouragement.

Located in Eugene, OR in a quaint double-decker "marketplace", it is a dream setting for any ultimate stash enhancement experience. There's food, interesting shopping, food, fountains, and beautiful spring flowers on display the likes known only to the Pacific NW (or maybe Holland or Utopia). Beauty abounding and stimulating the senses while compelling a girl to reach for her debit card, I thought, well if I'm going to lose the nest egg, I may as well have something to show for it. I'm goin' in!

Upon entering Mindy's magical, so this is what lies beyond the pearly gates, shop you're immediately struck by the unexpected. Clothing? Trim/braid/ribbon? Buttons galore? Not just any buttons or trim and braid but special, special examples of every unique design and color imaginable and in abundance. The array of color and volume alone were mesmerizing; Mindy is most definitely all about color and creativity.  Make no mistake you've not seen anything like this before, and then suddenly you realize this needlepoint shop is the creation of One Gifted Woman. Add in a measure of incredibly nice and service oriented and we have a winner. Road Trip!

Back to earth, I was there as my Mother's Day treat from my daughter. My mission was to choose a canvas representative of Mindy's known talent. I was familiar with her work, always admiring and drooling over her Asian themed designs expertly painted with precision. I'm happy to report that I found just the right masterpiece. Make that masterpieces, after all who among us could confine themselves to just one of her works of art. I love the colors, design and the Chinese coin and tassel on this one. Nice touches all. I'll be adding more about my Mother's Day spree in a later post, and wanted to make sure you knew that these few shots of Mindy's place is just the tip of the iceberg, there's another 2/3 of the store not in view!

Also, I couldn't omit letting you now what a delightful lady Mindy turns out to be. She is so gracious and was so very generous with her time in assisting us and other customers. Expertly pulling the threads for my canvases, it would have taken me hours. And the threads, I can't wait to tell you about the threads. Although you'd never guess it possible by looking at her, Mindy has done this for 30 years and it is second-nature to her.  A devoted mother first, this talented artist and shop owner has created one of the most innovative and original shops this blogging needlepointer has had the pleasure to visit. Although well worth the trip from anywhere, if you cannot go in person, visit her at her website, Mindy's Needlepoint Factory and enjoy!

Sunday, May 8, 2011

HAPPY MOTHER'S DAY!


1971

Thank you for stopping by so I can say hello on Mother's Day! Today I hope you find yourself enjoying an exceptionally loving day with your children and/or with with your own mother. You deserve it! I wanted to share my bouquet with you, it is filled with fragrance- roses, carnations and stock interspersed with lovely pink hydrangea. Thank you DD, you are beautiful!

I've been away for a while visiting Washington State and Oregon with my husband. The Pacific Northwest is a beautiful part of the country and I hope to visit often as there are so many amazing things to see and experience. I rented a car with plans to tool around antique malls and needlepoint shops while my husband was working but unfortunately the first 10 days I was under the weather with some bug I undoubtedly picked up on the airplane. Bummer. I wasn't able to get as much stitching done as I had hoped. Traveling by plane doesn't allow to bring a lot along, but I did get got some areas done on my White Santa Nutcracker and will post this soon. Actually I have nearly completed it and am beginning the tedious turkey work and then on to background.
Our daughter arrived for a visit last weekend as a special treat for my Mother's Day. We ended up exploring the countryside alongside the Columbia River while driving to Portland, OR. The backdrop of a snow covered Mt. Hood was gorgeous and unrivaled!  Pendleton, OR is nearby too and we must have seen literally hundreds of sheep, all ages, sizes, sheared, unsheared. Lovely creatures to see on the green hillsides.

We feasted on Dungeness crab and even had sturgeon fish and chips. There were numerous antique malls along the way and we tried to visit them all. However, the highlight of the trip was a few hours south of Portland in Eugene. I had always heard about Mindy's Needlepoint Factory but never dreamed I'd get there but my enabling family was bound and determined to treat me to a day at Mindy's....who am I to disappoint? OMG it was amazing. Read about it in my next post.


Monday, March 28, 2011

Seeded, bugled, done!

I've had this done for a while but have a new computer that includes new software to get used to; Photoshop to be more specific and I have yet to learn how to use it. I think I need a tutor, honestly. I am lucky to get these pictures up at all. The color is a little off. Humph.
Anyway, after making the final decision for the beading on this piece I ended up eliminating the turquoise flower beads. They were good in color, but not really fitting for this design. The objective was to fill in the original non-stitched area which was done using bugle and seed beads; two seed beads then one bugle then two seed beads. Naturally I began the process before ensuring I had enough of each bead type in my stash. And naturally I didn't. But a quick trip to the LNS and I was lucky enough to restock with Sundance Designs #17B seed bead. I had enough of the bugles. YAY! The rows of beading really added to the oveeral texture because (even though it's not as visible in the photo) the dark shades used in the beading accentuated this part of the design but didn't detract from the overall flow. Stitching this piece was thoroughly enjoyable and stress free which, after all, is what stitching is supposed to be all about. I love bargello and there is a lot of it on the web these days. I recommend it for relaxation and a quick sense of accomplishment! Next step...off to the finishers.

Wednesday, March 9, 2011

Bodice, Bell and Belt

I am thoroughly enjoying this project; it's very compartmentalized (unlike me who is all over the place usually). The center chest area was next and I really liked the lacy effect of this stitch, Four-way Continental. It's easy and quick and adds texture even using floss. The grey outline is perle coton.

The jacket bodice was outlined in gold Neon Rays (regular Continental on the right and reverse Continental on the left side, you need to enlarge the photo to view it). The inside was filled in with Criss Cross Hungarian in white Neon Rays and Continental stitches in floss in between. The sleeves are the same stitch again reversing on the left. Another fun textured look.  The bell is mostly Basketweave but the outside of the bell was padded 3 times! Then diagonally long stitched in Balger braid #8 to cover. The belt buckle to the right is Smyrna Crosses and tent stitches; using doubled over Balger #8. The white part of the belt is outlined with Neon Rays and then padded once with perle coton and covered over with a vertical long stitch in 5 ply floss, stitched over twice.

Santa's mittens were padded once with perle and stitched over in long stitch with 5-ply floss. Cuffs on the sleeves were French Knots in 2 ply Medici in grey, then a row in 1 white and 1 grey strand, then all white. Cute!

I didn't get to stitch today but plan on tackling the fur on the jacket and hat in the next day or two. I still haven't practiced my Bullion either. Santa seems to be coming together pretty quickly. I think I like this as a stand up instead of framed or as a pillow...but I'm always open for suggestions. Many thanks for stopping in today!

Monday, March 7, 2011

White Santa and a little history


Who's watching who?
 I've been house/cat sitting at my daughter's home while she is in India. She lives about 10 minutes from me so it's easy to go back and forth between houses. It's been lonely though and I am so thankful for having the time to pursue all my favorite past times. Excuse me a moment while I brew a fresh pot o-Buckery and toast a bagel. (I could live on bread alone even though there are wise people out there that say otherwise.) Oh, and remove this curious kitty from my lap.

I haven't ventured very far away from either house in a week and have another week of "time to myself" to go. This type of reclusive lifestyle allows me to indulge and I've been stitching up a storm, surfing the net and looking out the window. I also made a turkey pot pie, mmmmmmmm! Just for me!

One day back at my house and feeling industrious I decided I should tidy up my stash room.  While sorting through my queue drawers I came across this canvas and stitch guide all kitted up and ready to go.  It's a nutcracker called White Santa, an awesome project I purchased some time ago. There is a little history with this piece as I first saw it stitched about 15 years or so ago and have coveted it ever since. Imagine the thrill when coming across it at my LNS.

I saw it stitched by a master stitcher and one of my favorite people of all time. Her name was Katherine (Kay) and she didn't begin needlepointing until she retired from the NYC School District at age 65. I met her when she was around 80 years young, highly active in AAUW and living with her 90 year old sister in South Carolina. Neither girl ever married, no doubt a contributing factor to their longevity and freedom to pursue their numerous interests unencumbered. Both of these fabulous women lived into their 100's and have since passed. I was very fortunate to enjoy the company of both brilliant woman for 10 years and am forever grateful our paths crossed. One day Kay gathered a huge bouquet of gardenias from her back yard and presented it to me; I carried it from room to room enjoying the fragrance for days.

White Santa is a canvas by designer Damarj whose painted canvases were often accompanied by thread and stitch guides created by Susan Portra, as is White Santa. My personal experience is that these painted canvases and guides are not that easy to find though you still run across them from time to time.  But if you do happen upon one you'll see they're beautifully painted.

When the stitch guide was created in 1990 there wasn't a vast variety of threads available and much of White Santa was to be stitched in floss. I have made my own substitutions.  Because the majority of this project is stitched in all white threads, Ms. Portra wisely begins with the face and from then on guides us to stitch from top to bottom to keep the stitched thread pristine.

This first photo is of the stitched face minus the mustache. I used Mandarin Floss, 5-ply in basketweave whenever possible. The eyebrows are french knots. The nose is padded with perle coton and then stitched over vertically with more floss and back-stitched.

In the next photo you can see the padding process for  Santa's hair using diagonal rows of perle coton then overstitched in the opposite direction with 2-ply stranded wool (I had a hank of Medici on hand). I am saving the mustache for last because it calls for a large bullion stitch and I need to practice first.

Santa's cap is first outlined in gold Neon Rays and then stitched in the Byzantine stitch using white floss, and then white Neon Rays for the tent stitches. The gold stars are Balger Braid #8.

Next up: the bodice, sleeves and bell.


Wednesday, March 2, 2011

Tug O' War

stitching is complete. I just love this Jean Hilton design. One of the best things I learned here is that there is so much you can do with color that might not be expected. I always thought that graduating shades of color made the bargello flow, but in this example I didn't have all the shades available in my stash and decided to improvise by choosing colors that worked together and only using maybe 13 thread colors instead of the originally called for 17. I like it, which in the end is all that really counts but realize there's always room for listening to the "opines" of others.

In Jean's booklet she talks about using large areas of unstitched canvas as part of the pattern when "laziness overwhelmed me..." instead of filling in the background.
Now while I loved this concept, I thought my piece might need a little something else in the unstitched areas. Realizing that bargello patterns are already "busy" one should not try to add a lot of distractions that may take away from the overall design. Distractions like beads. I really wanted to put beads on this thing, there are so many options, but when I started hand placing them on the canvas, just to see, there were very few things I could add that turned out to enhance the overall look.
Now I'm not sure if this will be my final choice for embellishment, I am leaning toward using these clear turquoise flower shaped beads, but only where you see them. The colors work, but I'm not accomplishing what I set out to do which was to fill in those unstitched areas. Why bother really? well because it's kinda different....wait, examining the photo I just thought of something more I could do. More later.

Tuesday, March 1, 2011

Judy Harper

I am so sorry to learn about the passing of Judy Harper. I knew her as a witty, highly intelligent talent with a hilarious sense of humor. There was so much to learn from this accomplished lady and it's really sad that she left us so soon. According to Judy she had so much more work to do as she always gave us her all.

Life's lessons were her specialty and I absorbed everything she told me and was always in awe of her energy. We met visiting each others' blog when she let me into her funny world where we both had fun with our bantering and commentary. Judy was both wise and frank and I will miss her and all she had to offer the stitching world. God bless you Judy and happy landings winging your way into the arms of your beautiful Madeline. 

I found this beautiful tribute here:   http://hosting-tributes-24744.tributes.com/show/Judy-Harper-90878584. 

Thursday, February 24, 2011

(H)owling!

with joy since I finished stitching the clip-on owl ornie yesterday. The canvas by Labors of Love Needlepoint is so well painted and fun to stitch it "flew" by. Also, Toni Minieri has done stitch guides for many of  the different birds available. I decided to stitch the back side with 2 threads throughout where the front side body and wing were stitched with a single strand of Burmilana. I think the front looks a little more feathe-rlike than the heavier back. It's really not that noticeable in either case. My next thought is "Do I want to attempt to finish this myself?" Will keep you posted.

The feathers included are to be placed on the tail only, but I am tempted to place them elsewhere on the bird. Maybe over the wings? on the back? Again time will tell. A clip is also included making it very easy to clip onto the Christmas tree or elsewhere.  The finished size is 4"x 5" not including tail feathers; a nice size to clip on a larger house plant or any where really.

Many thanks to my dear friend Melanie for gifting me this delightful owl with all the trimmings!

Thursday, February 10, 2011

Bargello on My Mind

Thank you all so much for your kind words of support; I am very appreciative you took the time to comment, it helped a great deal. As you all knew it would happen, the sun is shining again and things are getting back to normal. YAY!

I went back home on Sunday only to return to town on Monday night thanks to a predicted 12 additional inches of snow in the forecast and waaaaay below normal temperatures looming. I realized I would be stuck for several days if I didn't leave. Anyway this time I brought some stitching with me. I grabbed a bargello project that's been in the hopper for several months (years more likely) and have been stitching as if I were on vacation or something. Stopping only to come up for air and food.

I admired, okay coveted, this booklet of incredible bargello designs created by Jean Hilton, for a long while and found it (miraculously) for sale at one of my needlework chapter's tag sales. Score! I had seen the cover piece, "Down the Garden Path", finished once and had my sights set on doing it. Long ago I pulled threads for it only to later raid the "kit" a number of times leaving me short on what I needed. Most everything in the booklet is stitched in perle coton #3 and round metallics on 18 count canvas (lots of color choices on 18 ct).

I did, however, have almost everything kitted for another interesting design, "Tug O' War" which, because of Jean's thread and canvas color choices, seems to have a southwest flavor. I did some creative substituting (why else keep a stash closet half the size of a small bedroom), mounted the canvas and just began stitching. That was on Tuesday and here is where I am today. To me, there's not a lot to demonstrate here and maybe not even a lot of interesting chatter but let's not let that stop me.

While there are a number of wonderful books around on the topic of bargello, written by artists far more knowledgeable than I, for me it's pretty much establishing a pattern of long and short stitches, repeating it in graduating shades of color and voila an incredible piece of stitched art emerges.  The real talent lies in those professionals that design patterns and experiment with color variations; I just follow their lead.

Not so fast, it sounds a lot easier than it is, actually. Just when you think your only requirement is to methodically stitch along daydreaming, you suddenly realize, wait that doesn't match up. What's wrong now??? Miscount...typically. But for me it's usually I didn't study the pattern closely enough, if at all, and there was a subtle pattern adjustment that went unnoticed...until it was too late. Such is the case here, see the central part of the design? well it has a break in the colors. Oh sure it looks easy to spy now, but if you're cruising along bargello-style, you miss it and I did. Oh well, in the words of Porgy and Bess, "Wintertime and the ripping is easy."

As it turns out it is a good thing I have this positive feeling about ripping out because in my substitution of threads I crossed the line. Thinking it was the color that only counted in bargello I totally ignored that the texture of the threads counts every bit as much. In the full photo (notice the light blue and light peach next to it) of my unfinished piece you can see that instead of using perle coton (because I didn't have that color on hand) I chose to use a stranded silk. Huh? Well the colors were right but now that I see this nearing completion, frankly those silks stand out like sore thumbs. Perle coton has a delightful sheen and it's twist reflects texture adding to the overall beauty of the design. It's actually perfect for bargello, no laying of threads although you do have to make sure you keep dropping your threaded needle to prevent any extra twisting. So soon I'll be off to my LNS for the appropriate colors of perle. Clearly I should have actually read all of those aforementioned books on bargello instead of just looking at the pictures!

I think I would like to have this piece finished into a portfolio of sorts to carry larger pieces of my needlework projects. The finished design size is approximately 9.5"x10.5". As always, thank you for taking the time to visit today, I wish you hours of joy-filled stitching and am looking forward to next time!

Sunday, February 6, 2011

Touching Base

This email was started a few weeks ago and I had been debating whether or not my blog would be an appropriate venue for this. After much internal deliberation and now with my latest news, I decided to just go with it.

To say the past month was eventful would be an understatement. I've been wanting to write about our holiday celebrations and share with you the joy these special experiences brought into our hearts. But apparently the universe demands balance and there always seems to be something to help remind us of this. Damned universe.

It's been quite a month weather-wise too, our temperatures have been record breaking in both directions from 68 degrees one week to below zero the next. Well I really got the "macdaddy smackdown" this week. . I am most grateful to you my friends for bearing with me as I express myself here.

In Memoriam

Born on St. Patrick's Day he was a beautiful child, a bright young man, a jitterbug king from the 1950’s I’ve heard. A huge sports fan, he could have made his living commentating on the radio. My husband’s older brother, whom I’ve known and loved for over 40 years, passed away on January 17.

As I reflect upon this loss I am reminded of the reality that our outer “shell”, existing only to harbor the real person we are, was never intended to last forever. Vulnerable to a variety of maladies and conditions it eventually ceases to go on; yielding to the circumstances and terms of a life lived.  Still it’s hard, we think in terms of living, believing our body will continue to serve us faithfully as we do our work, perhaps touch and love others, or as we give our all in whatever form we choose, it remains, we have a finite time in this physical world of ours. A fleeting moment to achieve, experience and leave our mark. I know there’s more in store for all of us once the physical is gone; but still I mourn and miss him. I am sad and feel the loss. I am sorry for my husband’s grief and concerned how losing Patrick will affect the rest of his family. I’m filled with faith that we will meet again. RIP ol’ card partner.

And then...

You may recall meeting my kitty in a previous posting or if you scroll down the page you will find the slide show of my beloved pet Teddy aka the Bear. I wanted to let you know that the Bear died unexpectedly in my home on Monday. I don't really know what happened, he was only 13 and seemed to be in the peak of health. I am beyond heart broken and am having trouble keeping this sad event in perspective just now. He came into my life to be doted upon, indulged, pampered and dare I say loved because it felt like love; but it is so very clear to me that Teddy was here primarily to bond with my heart and it's this loss I feel the most. It's hard to believe and accept the finality of all of this. Damned universe - can't live with it can't live without it.

I'm staying at my daughter's house since my husband is away but I hope to get back home to my normal day to day activities soon (weather permitting -remember my driveway?). So far nothing seems very natural to me right now and my desire to create is no where to be found, but I am optimistic that the sun will once again shine and I'll be back on my stitching throne and feeling contented. For those of you that have been there and understand, thank you kindly for your empathy; for those of you that don't, it's okay, I don't fully understand this myself. For all, please know I'll keep you close until next time.

Sincerely thanking you for making it down this far, you are a friend ever faithful. Madonna

Monday, January 17, 2011

Owl Side One - completed

Hope you had a great weekend and enjoyed some serious stitching time. Saturday was my "stitching with my peeps" day; enjoyed a wonderful breakfast and morning of stitching with 9 of my local stitchy friends. I made progress on my owl, enjoyed seeing what everyone else was working on and just enjoyed being with my friends for the first time in a long time.

After taking in the advice of readers about the owl I changed things up a bit. On the upper outside edges of the owl's body, I continued stitching with 2 strands of Burmilana. As I moved further down the sides I began using only 1 strand of Burmilana. The result is a lighter, more feathery look to the stitches. You can see the difference of 2 vs 1 strand in the photo on the left.  I was happy with the look and decided there was no need to rip out the 2 strand stitches. I also followed more advice and decided to just alternate thread colors rather than strictly follow the painted canvas. It made much more sense to me to stitch this particular canvas this way.  

Next up, the wing which was fun to stitch. First, it is the last section of side one of the owl, so naturally I was delighted to get started on it. A couching pattern is used. Laying a strand of Kreinik #12 braid for the foundation you must completely couch one foundation row before laying the second .
Four shades of Burmilana are used on the wing; row one uses color one and couch pattern one all across the row. Row two uses color two and couch pattern two across the row, and so on with row three and four; continue repeating rows one through four until you reach the end. The photograph does not do the stitching justice; the flow between body and wing are more subtle in person than in the picture. You can see she the shiny braid peeking through the stitches. I think the wing colors and pattern contrast nicely between wing and body. I like it. I have a little clean up to do before moving on to finishing side two. It's great to take photos of your work when looking for imperfections, missed stitches etc. as, like it or not, the camera makes every flaw stand out.

I'll be working on the second side next; I've already stitched the back of the head and will proceed with the body and wing of side two. Then I'll need to decide where the actual feathers will be placed. Yes, there are real feathers included in the kit. The instructions suggest using them as tail feathers, but there are enough included that I might be able to overlay them somewhere on the bird besides the tail. We'll discuss that next time. Meanwhile thank you very much for visiting today, will see you soon.

Sunday, January 9, 2011

My nocturnal bird of prey is moving right along!

Hi all! It's snowing and we're predicted to get enough to keep me inside for a few days stitching; a situation only possibly enhanced if some of you were here too! Pinch me! Thankfully I have all the important food groups covered (coffee, cream, butter, bread, chicken soup..);  my dear kitty Teddy nearby; broom and gloves positioned near the front door to clear off the satellite dish...seems as though all the planets are aligned.... Happy dance!   

Late last night (apparently I'm taking on the habits of my subject here) I finished stitching the back of the owl head using the Inverted Small Diamond Ray stitch; a great choice for feathers especially when you're trying to achieve a sense of order with how the "feathers" lay? lie?. Let me just interject something that I believe I've expressed somewhere on this blog in the past, about how I seem to fall into the same quandary when stitching a painted canvas.  The back of the owl head is a perfect example of the feather ruffling impasse I typically reach when trying to bring the painted canvas and stitch choice into harmony.

This canvas has been painted with near perfect uniformity when looking at the color placement for the feathers; this is wonderful if I were doing tent stitch, but in this project I am not because I want the chosen stitch to create the illusion of feathers. The suggested stitches and the painted canvas are perfect here....just not for each other. I'm not questioning the stitch guide at all; I'm merely saying that I don't know how to implement the two together.

The challenge for me is to reconcile color placement with stitch placement and I always seem to struggle when determining which takes priority. Unfortunately this slows down my pace, I end up ripping out and ultimately getting a little frustrated. Understand that while I'm addressing this project specifically, I often come across this conflict with most painted canvases I stitch. Maybe you can see what I'm trying to explain in the photo on the left as you view the stitched part of the body (using Offset Ray) versus the unstitched portion directly below. The wing will be stitched in a totally different way.

I am not trying to achieve perfection at all and yes stitching is about enjoyment, but I do wish there was some type of a "rule" or method from which to consider the various options? If only to move me a long a little faster. Believe me it's crossed my mind to ignore the colors painted on the canvas, and then using the feather stitch, alternate the 3 or 4 thread colors as I go along. Am I taking the stitch/color connection too literally? I don't know but I am hoping there may be a word to the wise (owl) out there from stitchers that may throw a (wing) tip my way.  I am all ears.

Saturday, January 8, 2011

Great stitchy week!

Off and on all week I've entertained myself by reading your blogs, surfing stitchy websites and wandering in and out of my stash closet seeking inspiration for just the right project. It was wonderful catching up on everyone stitching and reading about the holidays, etc.; blogville kept moving ahead despite my dormancy, thank heavens. 

I created lists of new starts and UFO's from which to choose my next project and actually spent several joy-filled hours putting together thread kits for various projects including a new chart I purchased pre-hiatus, Laura Perin's One Long Panel. All of Laura's suggested colorways are lovely making it difficult to chose just one. I put two options together out of my stash and now I'm ready to get started whenever the mood strikes! I noticed Spinster Stitcher is working on this design and making great progress too.  Just in case, Laura sells her charts on her website if you can't readily find them locally.

Next I turned to ogling my painted canvases. Realizing most of them didn't come with a stitch guide, I gathered up my 5 volumes of Amy's Cookbooks of Stitches and settled in for some serious reading. These are great books and I learned so much; I am always stunned to find out just how much I don't know about my favorite pastime!

After many hours I realized the best thing for me was to just start stitching....on anything.  Stop the hemming and hawing nonsense and get on with it. So I chose a painted canvas given to me in September, "Labors of Love" Owl. The canvas came with a stitch guide written by the amazing Tony Minieri. Would you believe in all the years I've been around I've never had the pleasure of possessing a TM guide. He's famous for them.

So far my feathered friend has Kreinik braid for his eyes in tent stitch with a Splendor outline. His face uses 3 strands of Amy's Burmilana in the Double Brick stitch and is very effective for this birdie. Check out his beak, TM suggested Oblong Plaited Diamond stitch, which has 36 passes in all. Great beak! Owly is just one of several birds represented and all include real tail feathers!

Well thanks to all of your encouragement I'm on my way and very pleased to be starting out the new year with such a fun canvas. Thank you very much for sticking with me. See you very soon.

Friday, December 31, 2010

BLOGGUS INTERRUPTUS

First, I didn't want one more day to pass without saying hello and offering up an apology for being away so long. I also want you to know that I've truly missed connecting with you and it has been most assuredly my loss. I thought I was ready to come back before, but you know how when you go back to work too soon before you're completely over what ails you? And then things come back with a vengeance? Well that is what I did in my last post, I came back too soon. I wasn't done doing, fixing, figuring, healing, helping, ruminating and there was a fair amount of sulking too.

Anyway, lately it's been all about life's distractions and how I deal with them. Seems if I do not believe I can take the time to fully concentrate on writing my blog or stitch, it doesn't happen. Does that ever happen to you? I've had slumps before but this is ridiculous. I usually finish whatever I start, but I have brought out 3 or 4 stitching projects recently which are now holed up lifeless in a bag somewhere. Well, both blogging and stitching require a certain amount of creative inspiration to even get started, at least for me anyway, and that seems to be missing here. Blah blah blah, I know, I hear you  but it's true....at least here in Mamby-pambyland, USA where I've been spending most of my time lately.

My daughter wisely advises, "Get over yourself, power through it." And she's right, there have been many good things that have happened too. But I laugh and assure her that at 61 my "powering my way through it" days are in the rear view. Not interested. LOL! Not that I can't. Oh, I can still power my way though things such as dusting this house within an inch of it's life, it's the abstract things that cause all the difficulty when life interrupts.  A product of the 1960's philosophy, "If it feels good do it" I've added, "if it doesn't, don't."  I can hear Dr. Phil now, "How's that workin' for ya?"  I'm not sure, but thankfully I'm not a basket-case just yet and I've not lost my sense of humor either. I'll find my way back, you'll see.

In the meantime, if you're still here, thank you! I've missed your company and our get-togethers so much and look forward to congregating back here again.  Sending you and yours my sincerest best wishes that all good things come your way in the new year. I'm looking forward to it.
HAPPY NEW YEAR 2011!

Tuesday, November 2, 2010

Returned, reactivated, renovated (I wish) and revitalized!

More like resurrected. O...M....G.....after all this time, she's still showing photos of anything and everything except the things this blog is supposed to be about.... stitching. What's with her anyway? Good question. I don't have a thing to show you as far as my stitching is concerned really; I've not been stitching. I'm perturbed about this because how does one get back stitching time lost? One doesn't. Well I just wanted you to know that I am still committed to my blog and thank you for sticking with me. Now my sensibilities tell me to stop now, don't drone on....but that's so unlike me to stick with my sensibilities. So here's your chance to escape otherwise, let the droning begin!

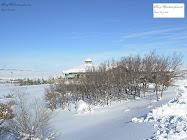
Since I don't have stitching to show you today I'm hoping it's okay with you that I share a few photos of my walk this morning. Albeit just up to the top of our driveway, it's a trek. The photo on the right shows me just about at the top of the driveway; looking forward and just beyond my shadow is a right angle turn that descends towards our house on right. This turn wreaks havoc with getting out on heavy snow days...so I just stay home. Fine by me most of the time. I often take my camera with me wherever I go in hopes something extraordinary should appear. Or maybe I might need proof that I actually did see a bear or mountain lion foot print. I saw no such things today, but I'm still in awe of what I do see everyday in the way of mother nature.

We don't have a lot of huge trees out here but we do have what is termed scrub oaks, which is mostly what you see in my photos today. The leaves are exactly like an oak tree and so are the acorns. They are the first to turn color in the Fall and the last to leaf in the Spring as they are very susceptible to freezing temps. They are prolific out here and even though I think they are technically a bush, they grow tall. In the upper left shot I'm standing in the driveway and can barely see the top of our house; lower left shot from further up the drive shows just how tall these "bushes" can get. They're always full of birds too; look closely you can see the Rockies beginning to collect snow. It's been so warm here. At least 10 degrees above average.


I always have a wonderful view of our neighbor horses and barn. They have two beauties, Yampa and Bailey. We do not have horses, I'd never do that to a horse.

There's something very comforting to me about the Fall of the year with it's warm contrasting colors, pumpkins and corn shocks, homecoming and making preparations for Winter.  All the elements to inspire gratitude for everything and everyone that surrounds my world.  I've missed you guys. I've been wondering just exactly what I wanted to say today on my first day back. I have a tale of woe but one not worth telling. I'm just so glad you're here reading....at least I hope you made it down this far. 
 
Frisco, CO
In contrast, this photo was taken in Frisco...a suburb of Breckenridge! I had to add this in because it's my seaway into the next onslaught of jibber-jabber. The elevation at my house is around 6300 ft; this is at about 9000 ft. and was taken about a month ago, and I assure you things look dramatically different now. We were up there for my birthday, just for the day tooling around in the fresh air; it's only about an hour and half from home. Had a great relaxing day. I didn't buy beads at Luna's or even go to Sara's needlepoint shop-what up with that, something was amiss. Not really, I just kept in mind that I haven't been stitching so....

So now that I brought up my birthday... check this gift out from an amazing friend. The beautiful lady that sent this to me came into my life over 20 years ago at my very first ANG meeting! Can't believe she's put up with all my nonsense all of these years...maybe it's because she lives on one side of the country and I live on the other? Probably. She is so thoughtful (and mindful about my stitch choice challenges) that my very own Tony Minieri stitch guide is also included. These are a series of clip on birds available. There's tail feathers and everything from http://www.laborsofloveneedlepoint.com/, I hope I can do it justice.
I also received this wonderful fall baking dish from a childhood friend, and I do mean childhood. I have known her since I was born, our parents were best friends and I don't mind reminding her that she is 9 days my senior! Happy Birthday! Howya holding up? This pottery http://www.packercreekpottery.com/ is located in the teensie town from whence we sprang! She still lives there. Isn't this amazing. My parents escaped moved to Arizona before my first birthday.

Then another childhood friend, from Arizona, with whom I spent every holiday in memory during childhood has painted this portrait in my likeness. I say in my likeness because there's not one wrinkle, line or any of my chins showing.  Love it, love you too Karen. Readers beware, apparently when I glom on to you, you're affixed for life! lol

 My family's gift will not be shown here today except for the box. AAHHHHHHHH!

So you've finally reached the end of today's post. I feel so grateful you're here, thank you.