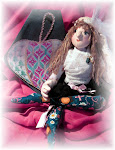
I very much enjoyed working on White Santa especially with all the various stitches involved providing a number of learning opportunities, I enjoyed them all.....well almost all. The turkey work pretty much bogged down the project for me. I do find it a bit tedious but hold out hope that it's just me and the way I execute the stitch. I take 4 passes with the needle and a lot of holding everything out of the way. Using 3 strands of Medici doubled over I was thankful there wasn't that much of it on this piece. If you have any tips or suggestions to make this stitch a little easier or work up more quickly, I'd love to here from you. Maybe you blog and have addressed turkey work and would like to leave a reference or just want to share how you handle this stitch. Thank you in advance for any advice.
In contrast, one of the stitches I enjoyed and surprised myself with was the double bullion used on the mustache. The stitch guide provided excellent instructions making it very easy to do. At first apprehensive whether I was up to the task, after a few practice stitches I got the hang of it and am still amazed that it turned out as nicely as it did. I wanted to demonstrate this technique but needed a third hand to hold my camera so I will attempt to explain the process in my own words and hopefully you can visualize this.
 First, using 2 strands doubled over and knotted, secure the thread away and come up through the canvas pulling through the length of the thread until it stops. Hold the needle between your right pointer and thumb and begin twisting clockwise until the strands have a very tight twist. Grab the twisted thread at the center point of the length of thread with your left hand and then with your right hand plunge the needle down through the canvas one thread over stopping just short of the needle going all the way through and keeping hold of the thread in your left hand and the needle in the right. With the twisted strands still in the left hand begin to twist them counter-clockwise until the threads are tight. Now gently begin to pull the the needle all the way through to the back of the canvas and as you continue pulling the bullion begins to form on top of the canvas. Once you've pulled the thread all the way through, bring your needle back up through the canvas where you want to secure the loose end of the bullion and secure it catching a thread on the underside of the formed bullion. In my case, as instructed I made my bullion curve to form one side of the mustache and then repeated the process on the other side. I was impressed as to how easy this was. I am really proud that I was able to satisfactorily execute the mustachio thanks to the explicit, step by step instructions provided within the stitch guide.
Another interesting technique was used on the bag. The stitch is reverse basketweave but to me it looked more like a T stitch. Either way it creates the textural effect of a burlap bag and is perfect in this application. I also want to mention the pant legs which were stitched with rows of basketweave and French knots on one leg and turned one quarter turn on the other, again creating a great textural effect.
All in all the stitch guide, created by Susan Portra, made stitching this canvas as fun as it looks. Providing new challenges balanced by bursts of the familiar kept my interest peaked throughout the project. This, probably more than anything can motivate me to continue and finish my projects. Even though White Santa took longer than I expected I thoroughly enjoyed it. It will be finished, not as a stand up as first thought as the background is too "open" and IMHO needs more support, but instead as a 3-d rectangular block decorated to look like the front of a Christmas package. As always thank you for stopping by to visit today and I hope you'll come back soon!


